Time-Lapse Videos


What is it?


Time-lapse videos are essentially either a collection of pictures put together to create a quick video or a video that is sped up. The goal is to show a long period of time in a very short period of time. This is an amazing tool for educators as it can be used for so many different experiments and activities in the classroom.

There are a variety of ways to create time-lapse videos. Some will create videos for you. Some will take a group of pictures for you that you will then have to transfer into a video editing program and create a video for yourself. My hope is to provide you with some of the different options so that hopefully you can find one that works for you!

For those of you who follow my class blog, you’ve seen a couple different videos that we’ve done using the document camera. You can find them down below in the example section. We have an Elmo document camera that has a time-lapse feature as part of the ImageMate software that comes along with it. The best part about it, as you can see in the first tutorial video, is that all you have to do is set how often you’d like the document camera to take pictures and then leave it for as long as you’d like it to take pictures for. Once finished, it puts all the images together in a video for you. For my videos, I then just imported that into my video editing software and added a little music to it!

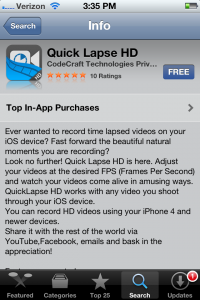
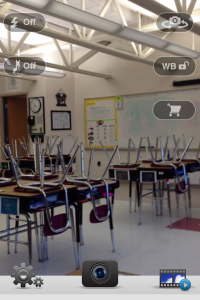
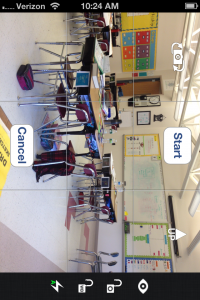
I know many of you probably don’t have an Elmo document camera though. However, many of you probably have access to an iPhone or iPad! There are many great apps that you can use for time-lapse videos (most are paid apps). TimeLapse and Quick Lapse HD are a couple of those apps. TimeLapse comes as a paid app. Quick Lapse HD begins as a free app but you must purchase extra time in the app if you’d like to make a longer video. Both are very simple to use and allow you to save the video to your phone which you could then upload to a site like YouTube. Personally, I prefer TimeLapse. The settings are very easy to manage. It allows you to set how long you’d like to record for as well as how long you’d like the video to be. It also allows you to choose a song from your library to play along with your video.

Quick Lapse HD

Quick Lapse HD Video


TimeLapse Settings

TimeLapse Video


If you don’t have access to any of the items mentioned so far but you have a computer running Windows XP and a webcam, you can also use WebCam Timershot. Webcam Timershot allows you to set up a webcam on your computer to take pictures at whatever increments you would like. The only issue with this software is that it only saves the pictures, which means that you then have to import all the pictures into your video editing software and create the video yourself.

If you have a Mac (which I don’t unforunately), you may also want to look into Gawker. This is a free program for Mac OS that allows you to use your webcam to create time-lapse videos. It even allows you to have a video showing four locations at the same time!

Video Tutorials


In the two videos today, I’ll be sharing how to use the Elmo ImageMate software as well as the WebCam Timershot program. The first video will cover the Elmo, the settings, and how to use it. The second will cover how to install, setup, and use the WebCam Timershot software. Of course, as always, if you ever have any questions about anything you see in the tutorials, just ask!


Examples


We’ve created a couple time-lapse videos for our classroom. For the first, we had the document camera take pictures of our entire day so that we could look back and see what a day in our room looked like. Unfortunately, because the software was tied in to our laptop, we weren’t able to use our smartboard that day though! Our second video was a time-lapse video of a Technology Night that we hosted for sixth grade students and parents. Parents had no idea we were recording them and then we surprised them with our video at the end!


Application in Class


There are so many amazing uses for time-lapse videos in the classroom. To begin, it’s just fun to be able to look back and see your entire day in such a short period of time. Students love seeing things randomly change, watching the hands on the clock fly around, and seeing what they did throughout the day. It’s also great to be able to go back and watch yourself during a lesson to see how you taught and reacted to students without having to watch through 45 minutes or an hour of video!

There are also a lot of educational uses. If you’re teaching about plants, you could setup a time-lapse video over the period of a couple of weeks to watch a plant grow. You could also watch things like mold grow as well. If you have a class pet, you could take a video of that pet after you leave the classroom so students can see what it does after they leave everyday. You could also set the camera on a puddle to watch it and learn about evaporation as seen in this video. For younger grades, you could record a video of outside your classroom over the course of a day to talk about time. Or, if you have a day that starts out raining and then changes to sun, you could create a video to spark discussion about weather. If you’re really ambitious, you could even take a picture of the same spot outside over the course of the school year that you could use as a video to talk about seasons.

Those are just a few of the many ways that you could use a time-lapse video in the classroom. If you have any other suggestions, I’d love to hear about them in the comment section!

Resources and Links

  • Primary Ideas: Evaporation Time-Lapse
  • Gawker – Time-lapse for Mac
  • Digital Photography Time-Lapse Ideas

  • *How have you created a time-lapse video before?*

    *What other suggestions do you have for ways to use a time-lapse video?*

    Kerpoof: All About Variety


    What is it?


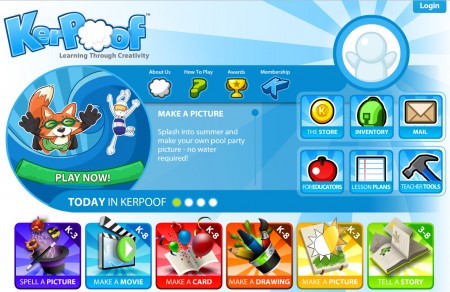
    Kerpoof is a captivating free site with a variety of different tools that can be used in the classroom. One of the great parts about Kerpoof is how it has different activities that cater to different age ranges so there are tools for the youngest of students as well as older students. Different tools include Spell a Picture, Make a Movie, Make a Card, Make a Drawing, Make a Picture, and Tell a Story. As students work and complete different tasks, they earn coins which they can use in the Kerpoof store to buy new items like paintbrushes for Make a Picture, backgrounds and animations for Make a Movie, or clothing for their avatar. This always keeps interest level extremely high!


    Spell a Picture is a feature designated for younger students or students who struggle with spelling. Students choose a background image. They then can either type in words or click on letters to create a word. Once a word is spelled correctly, images will appear with an arrow over them. Students can click that image to have it appear in their picture. For example, if students choose a space background, they can type in words such as star, sun, planet, or rocket. The appropriate pictures will have an arrow over them, allowing students to click and add them into the image.


    Make a Movie is one of my favorite features as it gets student creativity rolling. In this, students are able to easily create their own animated movie with scenes, music, and text. Students can add characters and objects with a simple click and drag. They can make them move, dance, and more by simply clicking an object, choosing an animation, and dragging it to the timeline. It’s a feature I highly recommend you check out!


    Make a Card is similar to the Make a Drawing feature where students are able to easily click and drag objects and words to the screen. They can add text and drawings. Once finished, it can easily be printed or saved as a jpeg file to share a nice message with someone else!


    Make a Drawing is a kid friendly paint option which allows students to easily draw objects which can then be saved as jpegs, saved to add into their animated movie, or printed. It easily allows students to add shapes which is great for the younger students. It’d also be a great place for students to draw pictures to go along with a story that they’ve written.


    Make a Picture allows students to choose a background and then drag images into it in a similar fashion to Spell a Picture. In this case, it gives more options for them to choose from. This could be used for younger students to create images to write about. It could also be another option for students who aren’t artistically skilled and would rather create a picture through here than Make a Drawing.


    Tell a Story is a Storybird like feature. It allows students to choose from backgrounds, images, add speech bubbles, and type in the text of the story. Much like all of Kerpoof’s other features. It’s very simple to use. Students can easily add more pages to their story, share it with a link once they are finished, print it, or download the pages they’ve created so that it can then be put into another program like PhotoStory or VoiceThread where they can narrate what they’ve done.


    Video Tutorials


    Below, you’ll find video tutorials that walk you through how to set up your own account as well as student accounts. You’ll also be able to see each of the different tools that Kerpoof offers in action. All of the videos can be distinguished by their title. The only one with hidden content is the final video which also shares how to use both the Make a Card and Make a Picture options.


    Application in Class


    Kerpoof can be used in a variety of ways in the classroom. The different tools open up so many different options that allow it to be accessed for any subject. In math, you could use the Make a Drawing feature to have students draw out word problems. You could use it for younger students to have them create arrays or fractions. You could use the Make a Story feature to have students actually create a math word problem using the different characters. You then could create a slideshow of all the created word problems and work on solving them together as a class. For English language arts, students could Make a Movie and write a story or script to go along with the movie. Younger students could use the Spell a Picture option to work on both spelling and typing skills. You could also have younger students use the Make a Picture option and teach them about using adjectives to describe what they created. For social studies, you could use the inventor story for Make a Story. Have them research the people who are on there and write a story about what they accomplished. You could also try to find a movie for Make a Movie that they could use to recreate a historical scene. In science, students could make a drawing that incorporates something they’ve been learning about. They could draw how photosynthesis works or what they saw occur in a science experiment. It could also be used to draw and label something like an animal cell. There are endless options for how you could use Kerpoof in the classroom.

    Resources and Links

  • Kerpoof lesson plans
  • Classroom Ideas
  • Video Overview
  • Kerpoof Review – ICT for Educators

  • *Have you used Kerpoof in the classroom before?*


    *What other ideas do you have for how it could be used in the classroom?*

    Using a Green Screen

    What is it?


    One of my favorite things to do in the classroom is to make movies. It’s an amazing tool to teach a subject or to check for understanding. It engages and enchants students. When they see what they’ve created, their faces light up. And really, isn’t that what we strive for, to find innovative ways to capture the attention and imagination of the students while being able to check for their knowledge of the content.

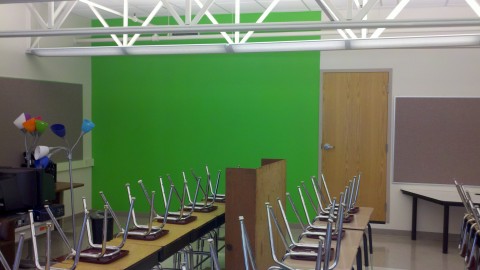
    For those of you who follow my class blog, you know that we make a variety of movies. The majority of our movies are shot using a green screen. Last year we used our green screen to create endangered animal news reports, a movie trailer for the book The BFG by Roald Dahl, interviews with famous people for our biography reports, our own version of The Brady Bunch called The Avery Bunch to learn about fractions, as well as numerous other math videos. This year, we’ve created the Math Movie Network. We’ll be using the green screen for numerous math videos throughout the year.


    Now, before we get to the tutorials, let’s talk about something equally as important, cost. As I mention in one of the videos, the majority of us are definitely working on a budget. A professional green screen setup with proper lighting and appropriate recording equipment will easily run you over $1,000 USD. The total cost for everything I use came to about $300 USD. That includes a Flip video camera, Pinnacle Studio 14 (the video editing software we use), a green screen, and two lights. If you already have a video camera of some sort, you can cut that cost right out! Of course, there are also other options for the software that you can use chroma keying (a green screen) with as well. If you have a Mac, you can use iMovie. If you have a PC, you can consider more advanced editing tools like Adobe After Effects and Sony Vegas. You can even use some older versions of Windows Movie Maker as well.

    When using a green screen, there are a few main things you need to keep in mind. First, you need an even color. That means if you are using cloth, it can’t be wrinkled, as this creates different shades of green. This also means that you need to use lighting from both sides to make sure there are no shadows behind the student or image in the video shoot. Second, on the day of video production, students can’t wear green or even a similar color such as yellow. The reason for this is that your basic video editing software uses something called chroma keying. This is where the software will extract the color green from your video. If you use a blue screen, it would extract the color blue. If a student wore a green shirt, when the software extracts the color green, it would, in essence, take away the students shirt so they would just become a floating head. Of course, that could make an interesting video on its own if you were interested!

    Video Tutorials


    In the first two video tutorials below, you’ll see how to use the chroma keying option in Pinnacle Studios. You’ll be able to see how to extract the green screen from the video and then add in either a background image or video. In the last video, you’ll be able to find a tutorial on using the green screen in iMovie created by Jonah Salsich, an amazing third grade teacher who I’m so glad to have as a part of my PLN.


    Examples


    Below, you’ll find a few examples of the green screen in use as well as the finished product after. The first video shows a student filming in front of the green screen. The second shows a movie trailer we created for the story The BFG. After that we have the third video which was filmed as an introduction to this year’s Math Movie Network. The final video was created by Linda Yollis and Jonah Salsich as part of their Reading Round-Up Blog.


    Application in Class


    There are so many amazing uses for a green screen in the classroom. It allows you to transport the students anywhere in the world as part of a video. I’ve enjoyed using it to create year long newscasts where students complete various reports “from the field” as part of a project. This year we’re using it to create a studio effect for part of our Math Movie Network. You could have students star in plays right in the classroom and then have parents come in to watch with the students. Students could also recreate scenes from history and you can import photos to match the era behind them. Once finished, you can upload it to a site like Vimeo, YouTube, or SchoolTube. You can then embed it on any of your sites! With all of this, there are limitless possibilities for student projects with a green screen.

    The green screen doesn’t have to just be for student projects though. As you saw in the fourth example video, Linda Yollis and Jonah Salsich do an amazing job of using it to share important material with students. It’s amazing through the use of a green screen and camcorder footage, they were able to put together this video even though they live thousands of miles apart. You could use it to create a video to share content or introduce a new unit. No matter how it’s used, a green screen engages and captivates an audience. There is no doubt that you will have their attention.

    Resources and Links

  • Easy Movie Making with a Green Screen
  • How To: Green Screen for Schools
  • Digital Storytelling: Green Screen

  • *Have you ever tried using a green screen before?*


    *What are some pros and cons to using a green screen?*

    VoiceThread: A Collaborative, Multimedia Slideshow


    What is it?


    VoiceThread is a highly engaging, collaborative tool. It’s main feature is the ability to comment on different slides that have pictures, videos, or documents on them. It’s very easy to create identities for each student so that they can leave their own comments on different slides. The best part about it is that you only need a link or the embed code to easily share with others and if your VoiceThread is public, anyone can add comments!

    Video Tutorials


    Below you’ll find three video tutorials. The first will show you how to sign up for a free educator account. The educator account will allow you to create up to 50 VoiceThreads or 250 MB of storage. The second video will teach about the MyVoice dashboard, how to create a VoiceThread, and how to use the comment feature. The last tutorial will show you how to create, change, and use different identities for your students.


    Examples


    The example below is a VoiceThread that I created with my class to share descriptive writing. Each student had to write a paragraph about an emotion or feeling but they couldn’t use the exact word. This forced them to try to describe what they felt to convey emotion.


    After you’ve signed up for an account and have had an opportunity to play around with VoiceThread, come back here and add a comment to share either what you like about VoiceThread or how you plan to implement it in the classroom on the VT below!


    Application in Class


    VoiceThread has many great applications for the classroom. It can be used in every subject area from math to music. I’ve used it to have students practice inflection in speech. We’ve created a VoiceThread to share information about where we live. For math, you could have students create their own word problems and have other students comment with answers. You could share different art projects and have parents and students comment on one another’s work. You could have students do research projects on plants, animals, a continent, or country. They could find pictures and videos about their topic and then use a video or microphone comment to describe each slide. You could even collaborate with a class from another state or country by choosing a topic such as local weather and have different students share with comments. With VoiceThread, your possibilities are endless!

    Resources and Links


  • Edublogs Teacher Challenge – VoiceThread
  • Cool Tools for Schools
  • Example of a VoiceThread – Happy Father’s Day (2KM and 2KJ Class Blog)
  • Example of a VoiceThread – Happy Birthday Mrs. Yollis (Mr. Avery’s Blog)
  • VoiceThread 4 Education Wiki

  • *What type of projects have you used VoiceThread for?*

    *If you’ve never used VoiceThread before, how do you envision using it in the classroom?*