There are so many amazing technology tools available for use in education today. The problem is that there’s often no money available through school budgets. Often we have to look for cheaper options to provide the most engaging lessons possible for students.
One tool that has really changed the face of many classrooms is the interactive whiteboard. It allows for teachers to easily create interactive lessons that allows for students to easily share their learning with the rest of the classroom. From SMART boards, to Prometheans, to Enos, the interactive whiteboard has changed the way many of us teach. Ideally, every school would be outfitted with one of these in every classroom. Again, budgets just don’t lend themselves well to this. We have to search for cheaper alternatives. That’s where the now! Board comes into play. It creates the interactive whiteboard experience and even better than many of these others, it allows you to do so on any flat surface!
Learning Resources has created a tool that allows you to easily set up an interactive whiteboard almost anywhere in your classroom. And all the pieces literally fit into a very small bag. All you need to go along with it is a computer and a projector and you’ll be up and running in no time!
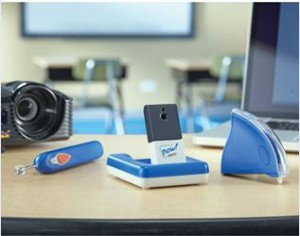
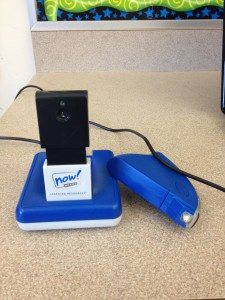
Upon opening up my now! Board package, I noticed how few contents there really were. It came with a small camera, a stylus, a wand and the software CD. After installing the software onto my laptop and reading a few instructions in the pamphlet, I knew anyone could have it up and running in just a few minutes.
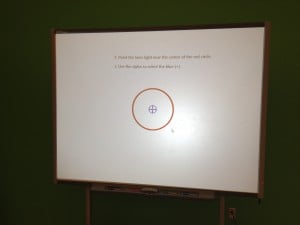
As long as your laptop is hooked up to a projector, you just need to hook in the camera through a USB port. When you open up the now! Board program, the camera will send out a red laser that helps you align everything, much like you would do with any other interactive whiteboard. You just have to align the laser with the center point and then use the stylus to touch 9 different buttons that pop up. After that, you’re good to go! Next time you open the software it will even ask if all the settings are still the same so that you don’t have to realign everything. After that, you’re good to go!
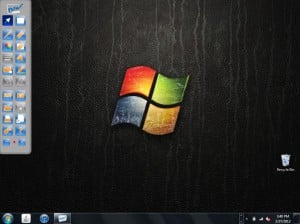
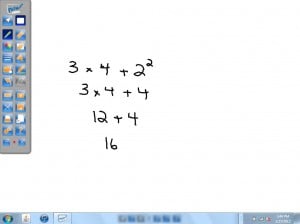
One of the first things I noticed was the dashboard that was really easy to navigate back and forth between all of the different tools. At the top it provided a button that would let you easily switch back and forth between a plain whiteboard background and your desktop. You can choose a pen tool which easily allows you to change color and size, a highlighter, and easily erase as well. You can also pull up a keyboard right on screen in case you’d like to type anything in. The stylus was relatively easy to use. It clicked very easily and to go from button to button, any student in any grade could work it pretty simply. It could sometimes be awkward due to the way that you have to hold your hand so that you don’t block the camera from the sensor though so that would have to be something they get used to. The junior wand also worked pretty well to navigate the dashboard. Click on the picture below to enlarge it and see all the different tools available.
Next I wanted to test out the whiteboard feature (even though it also works with any existing software on your computer). I stated by using the wand, which would seem to be the more natural fit for writing using the now! Board. I actually had a bit of difficulty with it. It wouldn’t write well when right against the surface, however it would when a few inches away from it. I eventually switched over to the stylus and found it to be much more effective. I had to be very deliberate with my writing in order to keep it pretty neat. I could see it working well for younger students while working with them on taking their time forming their letters. I think older students could also learn pretty quickly how to work it pretty well. It worked great when circling different objects or drawing lines between different things.
I eventually switched over to the internet to give it in both navigating and labeling. It was easy enough to switch back over to the arrow tool so I could pull up the internet. After bringing up the keyboard to try to type in Google Maps, I found that next time I’d just head back to the computer to type it in. Once it was up though, it was so simple to circle, highlight, and draw lines on the map. It’d be perfect in a social studies lesson such as labeling all the natural resources or landforms on a map.
My final test was to give it a shot on a number of different surfaces. As you can see from the pictures above, I began by giving it a shot right on my SMART board surface itself. Something like this would work perfect if you have something older that doesn’t work as well anymore. I found the surface to be smooth and easy to work with. My whiteboard also worked great and would probably be ideal for most classrooms. Again, having a smooth surface made the stylus very easy to use. I had a bit more difficulty on the wall. The way the walls are built in our school, it wasn’t completely smooth. Writing was a bit of a challenge as the styles would sometimes lose contact with the wall and I’d have to go back to where I had last finished off. If you had an extremely smooth wall, I feel you’d have much more success with it!
At a price point of $499, the now! Board is a much cheaper, much more mobile option than many of the alternatives. Being at a lower entry point into interactive whiteboards, it does have a few drawbacks as compared to some of the alternatives. However, if you’re looking for something extremely easy to get set up, something that’s compatible with any software but works well with it’s own whiteboard feature, and allows you to easily mark up anything on the internet, I recommend that you take a look at the now! Board. Just install the software, hook it up through the USB and you’re ready to get started!

